Tie Dye Tee Shirts, Totes & More Using Pleated Binding Techniques
Tie Dye Instructions for Accordion Pleated Tie Dye Patterns
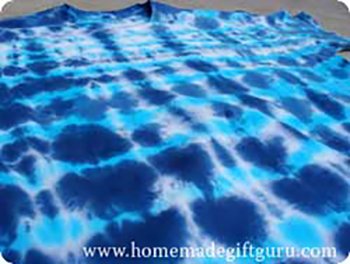
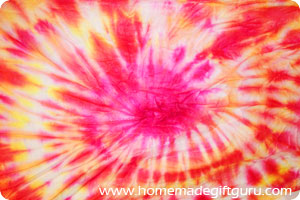
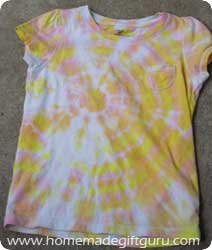
Accordion pleated tie dye patterns create fantastic tie dye tee shirts, tote bags and other clothes. It's a simple way to tie dye and a good choice if you're wanting something a bit different from the traditional 60's style spiral tie dye look.
Note... When it comes to homemade gifts for the guys, you might find tie dye tee shirts made with the pleated tie dye technique to be just right. The technique tends to create a tie dye pattern that is evenly dispersed and vibrant, perfect guy attire I've noticed, for both playing and relaxing.
The pleated or rolled tie dye pattern also lends itself well to thicker fabrics such as tote bags, skirts, pajamas and small blankets.
No matter who you are tie dying for, accordion pleated tie dye projects are a fun and easy way to tie dye.
If you are new to tie dying, be sure to check out these tips and step-by-step tie dye instructions for using cold water tie dye...
Also, if you need tie dye supplies... this cold water tie dye kit is a great way to get started!
How to Tie Dye Tee Shirts Using the Accordion Pleated Tie Dye Technique...
Use this technique to create fun tie dye tee shirts, tote bags, blankets, scarves, aprons and more.
Step 1. Garment Preparation
Gather Garments. Choose white clothes or light colored clothing, 100% cotton, linen and rayon are best.
Pre-Wash Fabrics. Always pre-wash your fabric according to fabric directions. Do not use fabric softeners or dryer sheets.
Soak in Fixer. Soak your clothes for 30 minutes in soda ash water (wearing gloves, stir in 1 cup soda ash per 1 gallon of water). Soda ash is a dye fixer that I highly recommend. Using soda ash water will help your dye to bind well with the fabric for high quality results.
Check out my write up on cold water tie dye supplies for more info on what you'll need to create high quality vibrant tie dye patterns!
...While your fabrics soak, the next step in these tie dye tee shirt instructions is to prepare your work space.
Step 2. Prepare Workspace
Protect Work Surface. Lay out plastic trash bags or sheeting (I like to cut kitchen trash bags open, lay them flat and tape down the edges).
Step 3. Bind Fabric (Pleated Binding Technique)
Pleat Fabric. Start folding your clean damp (soda ash soaked)
fabric from the center. Pinch fabric together evenly forming consecutive
pleats until you reach the end of fabric.
Alternatively, you can roll fabric instead, which will cause a
slight fade from where you start rolling to where you finish. Rolling
will however, cause a look similar to pleats. Experimenting is fun!
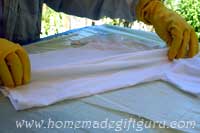
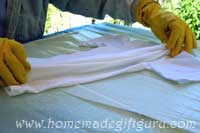
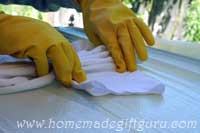
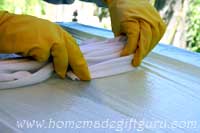
Bind Fabric. Wrap rubber bands around pleats (either evenly as done here, or in whatever pattern you choose).
You can get different tie dye patterns by wrapping rubber bands far apart or close together, sporadically or in a pattern, such as two close, one far.
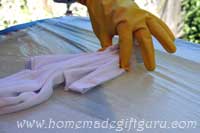
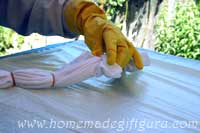
Once you have your fabric folded and bound, you can prepare your die.
Step 4. Prepare Dye
Prepare Dye. Follow instructions on your dye for preparation.
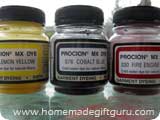
Procion MX dye requires 2 teaspoons of powdered dye to be added to 8 oz of water. For lighter colors you can add more water if desired.
You can apply dye using a squeeze bottle to squeeze it where desired or by pouring it, from a cup, onto desired area.
Both methods work, but squeeze bottles provide more control, plus they are easier to mix (simply shake well).
Tip:
It's a good idea to mix your dye in a place away from your fabrics
and work area to avoid specks of powder from blowing over onto your
projects or your work space.
Safety Precaution: To avoid
skin and eye irritation, it is recommended that you use rubber gloves
during the dying process and do not ever breath powdered dye dust (use
dust mask when adding powdered dye to water if possible). Always work
with dyes and other chemicals in a well ventilated area.
Step 5. Dye Fabric
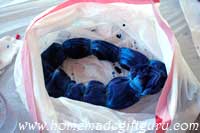
Squeeze or pour dye as desired. Add color however you choose. If you're unsure of your color palette or need some tips, there are several tie dye tips on this tie dye instructions page. Be sure to apply die thoroughly).
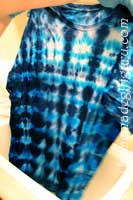
Note... For this tie dye tee shirt, I first applied cobalt blue dye in between rubber bands and then I applied the lighter teal dye directly to and around the bands.
Tip: I find it's helpful to use a kitchen trash bag to both contain the mess as you dye and also to wrap your project in afterward.
Step 6. Cover Fabric and Allow Dye to Set
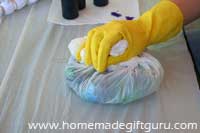
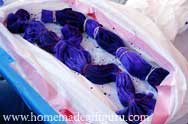
Cover Project. You always want to keep fabrics damp by covering them in plastic. Some people use gallon sized zip lock bags or simply plastic wrap. In this case, you can enclose the fabric right in the plastic kitchen bag, pushing out any air and twisting the bag up securely.
Tip... If you're dying several things, you may want to put your individually bagged projects together in an additional plastic kitchen trash bag (to be safe in case of a leak and to keep them all together).
Let Set. Allow fabrics to sit undisturbed for 24 hours. 24 to 48 hours actually! This fabric "baking" time, as I like to think of it... (along with the soda ash soak and your high quality Procion dyes), will give you well set, vibrant colors (rather than the faded colors that some tie dye kits and dyes result in).
Step 7. Rinse in Warm Water

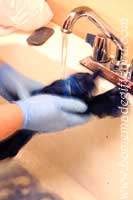
Rinse fabric in warm water to remove excess dye. Wearing gloves, remove rubber bands one by one. Unravel as you rinse. Continue rinsing until water runs nearly clear.
Tips. You may notice that some fabrics as well as some colors take longer to rinse than others. This has to do with the different dyes and fibers involved. When you're done rinsing each piece of fabric, put rinsed fabric on a clean plastic bag (or other plastic) and never let your various projects lay against each other at this stage, the dye will transfer at this point.
 |
 |
8. Wash and Dry Fabric
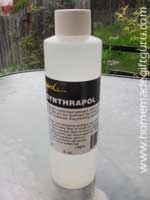
Wash Fabric. The last step in these tie dye tee shirt instructions will be to machine wash (or hand wash if necessary) fabric in hottest water suitable for fabric using Synthrapol.
Synthrapol is an industrial strength neutral detergent
that suspends the dye particles so they don't bleed back onto your
fabrics. This is how you keep all your colors where you want them (white
stays white and even bright colors keep to themselves).
Another benefit of Synthrapol
is that it allows you to wash different colored fabrics together
without any dye transferring between fabrics (see the various tie dye
projects being washed together above).
Important Tip:
Be aware that wet tie dyed fabrics resting against each other or other
fabrics for a long time still have a chance of transferring color. Take them right out of the wash when done and dry immediately.
Dry Fabrics. Machine or line dry as desired.
Done!
I love using accordion pleats to tie dye tote bags too. In fact, check out the following homemade tie dye gift idea for kids...
Matching Homemade Tie Dye Gift Idea for Kids!
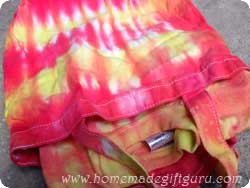
Matching tie dyed items can be fun homemade gifts for kids. You can use any tie dye technique but here my friend and I chose pleats. The idea is to choose two or more items to tie dye and tie dye them exactly the same (see below for tips)...
For big fun, tie dye a tote bag and fill it with one or more matching items such as the tie dye tee shirt above... You could also throw in a matching tie dye bandana, tie dye cap or hat... or even matching tie dye socks.
To Make Your Tie Dye Projects Match: The trick to
creating perfectly matching tie dye items is to make them in exactly the
same circumstances. Make them on the same day at the same time. Bind
them at the same time, dye them both at the same time with the exact
same dye and keep them together in plastic as the dye sets.
This avoids the subtle changes that can occur when using dyes mixed at
different times - possible with slightly different strengths, slightly
different set times, varying temperatures while dye sets, and other
random or unknown factors. Fabric can make a slight difference but
hardly noticeable when you use this tip.
More Tie Dye Techniques...
- Play with Marbles - Marble Tie Dye Techniques
- Easy Circle Tie Dye Shirts and More
- Spiral Tie Dye Tee Shirts and More
