Origami Box Instructions
Make a Perfect Homemade Gift Box Anytime You Need One with These Easy Origami Box Instructions

If you're new to origami, welcome! These origami box instructions, for creating a masu box, are a great
place to start.
The masu box is pretty easy to master and it will provide you with lots of cute and inexpensive packaging for your homemade gifts.
With just two pieces of 12x12 inch scrapbook paper and your hands, you can make a box as big as 4x4 inches. Of course, the smaller the paper you start with, the smaller your gift box will be.
This means that the next time you find yourself in a craft store, looking at all the pretty paper, you finally have a great excuse to buy up your favorites.
These handmade boxes make wonderful gift boxes for homemade truffles and other candies, as well as jewelry (handmade or store-bought) and just about any small gift or trinket.
My family LOVES to use these origami boxes for our Christmas countdown calendar, which we place all over our Christmas tree, creating a fun daily treasure hunt for the kids.
We also make origami boxes in several sizes, so we can fill them with goodies and create our own little origami tower of gifts. Depending on the paper you make them with, these towers can be created for any holiday or occasion!
Are you ready to get started?... Or perhaps you need a pep talk?...
Origami may look confusing at first with all the precise folding and unfolding but really... If you just follow the origami box instructions one fold at a time... you will suddenly find yourself with a really cool handmade box... Or a star... Or whatever you are creating. It's really not hard. I've seen people of all ages learn origami.
I suggest making one with practice paper first (repeat if needed), then break out the good stuff and start your real project(s). That's all it takes...
An initial walk-through using these origami box instructions and you'll see that they are not too hard to make, they get easier each time and they are fun!
Origami Box Instructions: How to Make an Origami Gift Box
Here's a few tips on choosing paper... You can use just about any paper, even card stock. However, I suggest using paper that is 65lb or lighter, and if you choose heavy paper, keep in mind that you'll need a bone folder or back of a spoon for solid creasing after each fold. The heavier the paper, the slower the origami process will be.
Try using origami paper, gift wrapping paper (recycled or new), construction paper, stationary paper, patterned scrapbook paper, typing paper, textured craft paper, newspaper, paper from books and magazines.
Tip: Keep in mind that one side will be completely
enclosed by the folds so you only need a pleasing color or pattern on
one side. In fact, you can even patch together a few different pieces of
scrap paper, into a perfect square... just keep the tape on the side that
will be hidden. This creates an interesting look.
Tools and Supplies:
For One Box with a Lid You'll Need the Following...
- two pieces of square paper (one should be cut 1/2 inch smaller in height and width than the other)
- your hands
What an easy supply list, right?!
Below I've provided a cheat sheet for choosing the right size paper for the size box you want to create...
What Size Paper Should You Start With?
- For a 2" x 2" box with lid: start with one 5.5" x 5.5" and one 6" x 6" piece of square paper.
- For a 2.5" x 2.5" box with lid: start with one 7" x 7" and one 7.5" x 7.5" piece of square paper.
- For a 4" x 4" box with lid: start with one 11.5" x 11.5" and one 12" x 12" piece of square paper.
- To make 4 boxes in 4 consecutive sizes (such as for a gift tower) I always start with paper that is 12x12", 10x10", 8x8" and 6x6" plus a second set of 4, each trimmed just 1/2 inch smaller.
Tip: The best origami boxes are made with perfectly square paper. If a paper is labeled 12 x 12" or 6 x 6" however, it's still a good idea to measure each side anyway and trim if needed. This is because there is a small variance in paper manufacturing and you may have an extra 1/8" or so on one side, which can make a big difference in your finished box.
Origami Box Instructions:
Start with a perfect square of paper with the patterned or colored side down and use the images and accompanying origami box instructions below as a guide for creasing and folding.
1. First fold point 4 to point 1. Open and fold point 3 to point 2. Your creasing will look like the letter X.
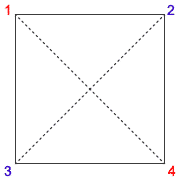
2. Next, take each point (1 - 4) and fold to the very center (point 5).
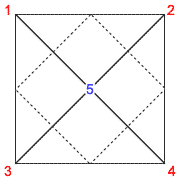
3. Now, with the corners folded in, you'll have a smaller square. Fold side 1 to center line (5) and side 4 to center line (5). Open both. Repeat with side 2 and side 3. Open both.
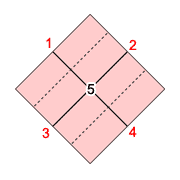
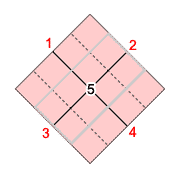
4. Open just two of the corners. Now fold side 1 to center line 3 and side 2 to center line 3.
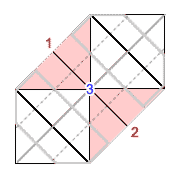
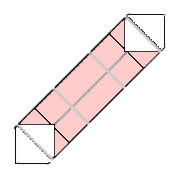
5. Next fold corner 1 in to point 2. Open. Now repeat this with all 4 corners.
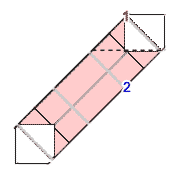
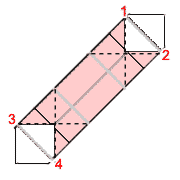
The box is almost done: The next part in these origami box instructions is harder to understand from written instructions but the truth is, all the folding and creasing you just did, will cause these last steps to practically form themselves. Do it just once and you'll see what I mean. One second you have a folded piece of paper, the next... a beautiful box!
6. Open sides 1 and 2 to form two sides of the box.
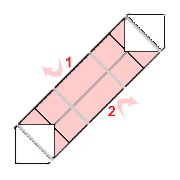
7. Push in the flaps (let the folds guide you) as seen by 1 and 2. Then fold point 3 down and into the box, creasing as necessary to form the third side and part of the inside bottom.
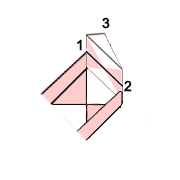

8. Repeat with the last side and now you have an origami gift box.
Let's review these origami box instructions with real photos...
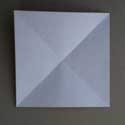
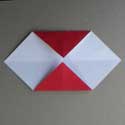
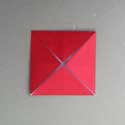
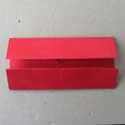
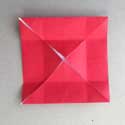
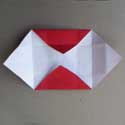
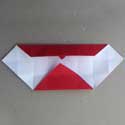
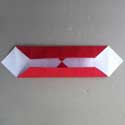
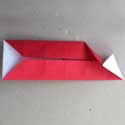
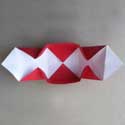
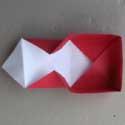
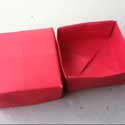

To Make a Perfect Fitting Lid: To make a perfect fitting lid, repeat this entire process starting with a square of paper that is 1/2" larger than the base. For example, a small gift box with a lid can be made with one each of 5.5" and 6" pieces of paper.
Starting with papers that are 6" x 6" and 5.5" x 5.5" makes a box that is a perfect size for a single truffle, which can be nestled within the box, inside a mini cupcake liner (as shown)... or you can fit four to eight truffles by using a 12" x 12" and 11.5" x 11.5" paper for your box and lid.
That completes these origami box instructions!
Below you'll find a few more creative tips and ideas...
Want to make your own truffles to go inside origami boxes? Check out these truffle recipes and tips...
Master This Technique and You'll Use It Forever!
Did you just make your first Masu Origami Gift Box?
Now make one more... Great job!
A couple more and you'll be a an absolute pro!
These easy little origami boxes are awesome for little treats, jewelry and more. Plus you can use nearly any paper you like as long as it is fold-able... think re-purposed gift wrap paper for example!
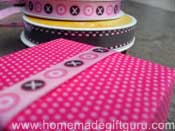
Creative Origami Box Ideas...
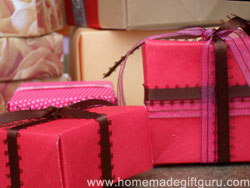
In addition to using gorgeous paper to make your origami box, you can wrap origami gift boxes in coordinating ribbons, raffia or yarns... this makes a big difference in final presentation.
You can embellish these gift boxes any way you like. Some ideas for creative embellishment include...

- Charms
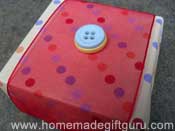
- Buttons
- Beads
- Dried leaves and flowers
- Whole spices such as star anise or cinnamon sticks
- Printable gift tags
- DIY gift tags using gift tag templates
- Scrapbook embellishments
- Fake fruit
- Silk leaves and flowers
- Even dried materials from the great outdoors like sticks and interesting seeds...
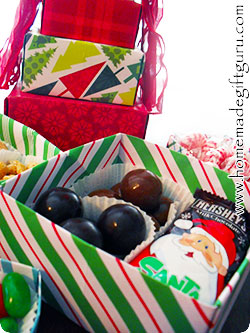
Make an Origami Gift Box Tower...
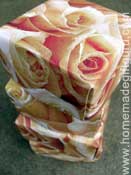
I love my origami boxes so much that I often make them into gift box towers! You can make your own origami box gift tower by making 3 or more gift boxes in slightly varying sizes.
For example, a beautiful four box tower could be made by starting with coordinating 12 x 12, 10 x 10, 8 x 8 and 6 x 6 inch papers. Make each box with a lid.
Fill each box with treats and stack them into a gift box tower. Wrap ribbon around the bottom box and pull ends to the top box to tie a bow.
Origami boxes can be used all year long...
Last minute gifts, birthday gifts, holidays, wedding favors, gifts for special occasions, thank you gifts, even fundraising and bake sale items will be more impressive when they come in an origami gift box.
See examples below...
One has a sheer ribbon wrapped around it with a couple buttons glued to the top.
The other one is made from Christmas gift wrap and has a simple 1/8 inch ribbon wrapped around it and tied into a bow.
