Tie Dye Instructions and Tips
Tie Dye Tips, Techniques and Step-by-Step Instructions...
Whether you are tie dying your own unique homemade gifts or tie dying just for fun... these tie dye instructions will help you get the vibrant, high quality results you want.
Learn more about using tie dye to create fun and unique homemade gifts here!
Tie dye is easy... but everyone seems to have their own way of doing it and not all tie dye techniques are created equal.
If you want...
- Your colors to be vibrant and gorgeous
- To tie dye a variety of fabrics (from cotton shirts to canvas bags)
- Your tie dye clothes and gear to stay vibrant and fixed...
...then you will like the following tried and true cold water tie dye instructions, including my best tie dye tips.
Tie Dye Instructions...
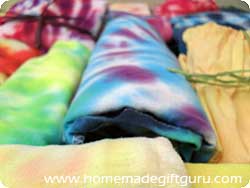
The following tie dye instructions and techniques use high quality cold water dye.
The actual process of tie dying is very easy but you will get the best results by following these tie dye instructions especially, garment preparation, tie dying and washing instructions.
1. Garment Preparation
- Gather Garments. Choose white clothes or light colored clothing, 100% cotton, linen and rayon are best.
- Pre-Wash Fabrics. Always pre-wash your fabric according to fabric directions. Do not use fabric softeners or dryer sheets.
- Soak in Fixer. Soak your clothes for 30 minutes in soda ash water (wearing gloves, stir in 1 cup soda ash per 1 gallon of water). Soda ash is a dye fixer that I highly recommend. Using soda ash water will help your dye to bind well with the fabric for high quality results.
While your fabrics soak, the next step in the tie dye instructions is to prepare your work space.
2. Prepare Work Space
- Protect Work Surface. Lay out plastic trash bags or sheeting (I like to cut kitchen trash bags open, lay them flat and tape down the edges).
3. Bind Fabric
Tip: It is a good idea to get all the folding and banding of your fabrics done before you even bring out the dye. It has a way of "getting around," and you'll like the peacefulness of knowing your work surface is 100% free of dye powder specks or dye drops of any kind.

- Squeeze Water From Fabric. Once fabric has been soaked, put on gloves and squeeze out excess water from fabric.
- Bind Fabric: Fold, twist, pleat and/or apply rubber bands as desired. There are many different tie dye patterns and techniques and like finger prints, no two tie dye projects will ever be exactly the same. Below these tie dye instructions you will find specific ideas for creating the pattern you want.
Tip: Clothes should be kept moist for tie dying. If you have several things to tie dye or if the weather is very hot, it may be necessary to keep your pre-soaked, now damp fabric covered with plastic (or right in a plastic bag) to keep fabric moist while waiting to be dyed.
Binding Techniques: Marble Tie Dye Techniques, Traditional Spiral Tie Dye Technique, Pleated Tie Dye Techniques, Easy Circle Technique
4. Prepare Dye
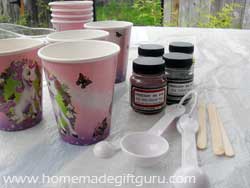
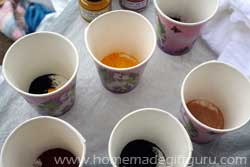
- Prepare Dye. Follow instructions on dye for preparation. Procion MX dye requires 2 teaspoons of powdered dye to be added to 8 oz of water. For lighter colors you can add more water if desired. You can apply dye using a squeeze bottle to squeeze it where desired or by pouring it from a cup (such as the left over party cups as shown) onto desired area. Both work but squeeze bottles provide a little more control, plus they are easier to mix (simply shake well).
Tip: It's also a good idea to mix your dye in a place away from your fabrics and work area to avoid specks of powder from blowing over onto your projects or your work space.
Safety Precaution: To avoid skin and eye irritation, it is recommended that you use rubber gloves during the dying process and do not ever breath powdered dye dust (use dust mask when adding powdered dye to water if possible). Always work with dyes and other chemicals in a well ventilated area.
5. Dye Fabric
Tie dying can be very messy! With that said, I have developed a pretty handy way of containing much of the mess. I use a plastic kitchen trash bag to both dye my fabrics in and to wrap them in (the wrapping keeps them damp while the dye sets).
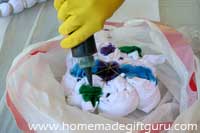
- Get Bag Ready. Open the trash bag and push down the sides so the bottom of the bag is your work surface. Lay your bound fabric on that surface.
- Apply Dye. Squeeze or pour dye as desired. The tie dye technique in this step of our tie dye instructions may also be determined by the tie dye patterns and technique you choose below. The project shown is a Spiral Tie Dye T Shirt and we do have a step-by-step tie dye instruction tutorial for the rest of the project shown.
Tips for applying dye...
1. Pouring. If pouring dye onto fabric, tip cup directly to the fabric and allow the dye to soak in as you slowly pour...
2. Puddles. If you find yourself with a puddle of dye under the fabric, simply use a couple paper towels to mop it up a bit. Some dye under your fabric is fine but avoid letting your fabric sit in a full blown puddle while the dye sets in step 6...
3. Gloves. With rubber gloves, it is surprisingly easy to take a damp paper towel or wash cloth and wipe dye splatters/smudges from the gloves. This will make it easy to use just one pair for your project, even if various colors will be used.
6. Cover and Let Sit... and sit and sit
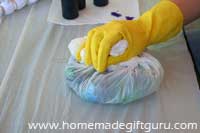
- Cover Project. You always want to keep the garments damp by covering in plastic. Some people use gallon sized zip lock bags or simply plastic wrap. In this case, you can enclose the fabric right in the plastic kitchen bag, pushing out any air and twisting the bag up securely. You may want to put your bagged projects together in an additional plastic kitchen trash bag (to be safe in case of a leak and to keep them all together).
- Let Set. Allow fabrics to sit undisturbed for 24 hours. 24 to 48 hours actually! This fabric "baking" time, as I like to think of it... (along with the soda ash soak and your high quality Procion dyes), will give you well set, vibrant colors (rather than the faded colors that some tie dye kits and dyes result in).
7. Rinse Fabric in Warm Water
- Rinse. After the dye has set for at least 24 to 48 hours, it's time to rinse away excess dye. Wearing gloves, remove dye soaked fabric from plastic bag, discard plastic bag and rinse the fabric in warm water. Remove any rubber bands and start to untwist as you rinse. Continue rinsing until water runs nearly clear.
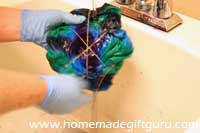


You may notice that some fabrics as well as some colors take longer to rinse than others. It's just differences in dyes and fibers.

Important Tip...
When you're done rinsing each garment, put rinsed fabric on a clean plastic bag (or other plastic) and never let your various projects lay against each other at this stage, the dye will transfer at this point.
8. Wash and Dry Fabric
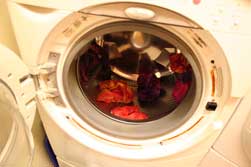
- Wash Fabric. The last step in these tie dye instructions will be to machine wash (or hand wash if necessary) fabric in hottest water suitable for fabric using Synthrapol.
 |
 |
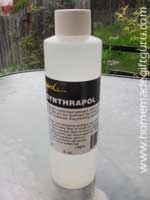
- Synthrapol is an industrial strength neutral detergent that suspends the dye particles so they don't bleed back onto your fabrics. This is how you keep all your colors where you want them (white stays white and even bright colors keep to themselves).
Another benefit of Synthrapol is that it allows you to wash different colored fabrics together without any dye transferring between fabrics (see the various tie dye projects being washed together above).
Important Tip: Be aware that wet tie dyed fabrics resting against each other or other fabrics still have a chance of transferring color. Take them right out of the wash when done and dry immediately.
- Dry Fabrics. Machine or line dry as desired.
That's it for these tie dye instructions... below you will find a few more tie dye tips you might find useful.
A Few More Tie Dye Tips...
- To get the same effect on each side (such as identical striping on the ends of a scarf), fold fabric in half first before rolling or pleating and binding.
- Being Deliberate. In addition to these tie dye instructions, you can choose to be deliberate about your tie dying style. A few examples... Start with the same color on both sides. Decide whether you want straps (when applicable) bound or not and do the same for both. Put complimentary colors next to each other. Plan colors ahead.
- Choose where you want your spiral to start and pinch from there... or your circles etc. For example, you might want a centered spiral or you might choose to have it start off centered to the side.
- Avoid mixing certain colors... mainly green and red. These colors combined make an unattractive muddy brown.
Since purple has red in it, be careful mixing green and purple for the same reason.
A great solution I've found for using purple, blue and green together (without muddiness between purple and green) is to start with the purple, squeeze the blue around the edges of all purple and fill in the rest with green. That way the green and purple will have a "padding" color between them... blue.
Don't Mix the Rainbow. Also, try not to mix too many colors directly together, this can lead to muddy results. Whenever mixing colors or allowing colors to bleed together, think about what those two colors will create.
- Keep in Mind Primary Color Basics. After reading these tie dye instructions, you get to decide
what colors and color combinations you want to try. To help you with
this I've charted the primary colors (red, yellow and blue) and what
you get when you mix them below. All colors are some combination of
these primary colors. Your colors will often mix along the edges so
here's the basics:
-Red and Blue... make Purple
-Blue and Yellow... make Green
-Red and Yellow... make Orange... (therefore Pink and Yellow make a shade of orange too, since pink is basically a shade of red)
-Many colors will just tinge each other... except red and green as mentioned above, they make a terrible brown... can you tell I've tried?
In addition to these tie dye instructions, tie dye supplies and tie dye tips, you might want to experiment with some of the following tie dye patterns...
Tie Dye Patterns and Folding Techniques...
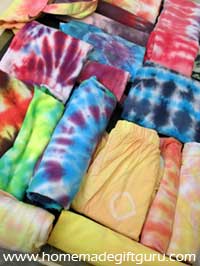
I have a few specific tie dye pattern techniques to share with you, beyond that the sky is the limit...
No two tie dye projects will every be exactly the same!
- Spirals... Learn How to Tie Dye T Shirts and other Clothes and Gear Using the Spiral Tie Dye Technique...
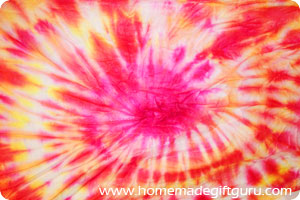
- Circles and Sunshine... Tie Dye Shirts and More Made Easy Using an Easy and Predictable Circle Technique...
- Tie Dye Techniques Using Marbles
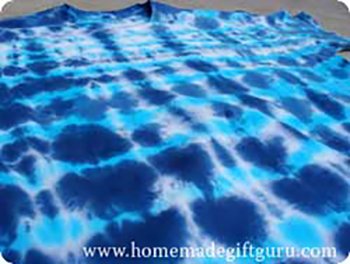
- Tie Dye Tee Shirts, Totes and More Using Pleats
