Easy Homemade Journal Idea
Learn How to Make an Easy Homemade Journal... No Bookbinding Required
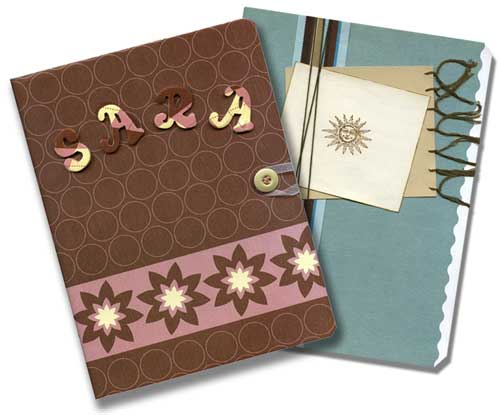
Want to make your very own homemade journal or custom homemade book? Not sure where to start?
If you've ever researched bookbinding, you know that actual bookbinding takes a bit of practice and requires the right tools.
That's why I made
this easy homemade journal idea 100% bookbinding-free. Homemade journals don't get any easier than this!
Plus, just about every part of this homemade journal can be changed or altered for different taste and purpose.
Speaking of purpose... check out these journal themes for cute homemade gift ideas! For example, you could make this a book for poetry, song writing or a place for recording favorite quotes as they are discovered.
So here it is... read on and learn how I turned a composition notebook into a beautiful and creative homemade gift idea.
How to Make an Easy Homemade Journal...
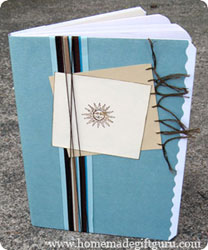
Once again, nearly every part of this easy homemade journal can be changed or altered.
This simple embellished notebook idea can be made to suite anyone of any age. Just follow these instructions, using your own choice of paper and embellishments.
To make this easy homemade journal, you will start with a composition notebook.
Shop for... Mead Black Marble Wide-Ruled Composition Books
Note: You can use other types of notebooks but
composition books tend to be sturdier than others. They are meant to be
hauled around, thrown in bags, left on the floor and otherwise tossed
around. The pages are not meant to be torn out, so your gift recipient
won't have to worry about a precious journal page accidentally tearing
away at the perforation and falling into oblivion. They are also
inexpensive (many dollar stores have composition books).
Material List:
- 1 composition notebook (100 sheet, 200 page, 9 3/4 x 7 1/2 in./24.7 x 19.0 cm)
- Paper in the following sizes:2 pieces cut to 11 3/4 x 8 1/2 in. (will make base of cover)
1 piece cut to 9 3/4 x 9 1/2 in. (decorative paper goes on top of cover base)
2 pieces cut to 9 1/2 x 7 1/4 in. for end sheets (inside of cover)
Optional Materials for Decorating:
- Decorative Paper 2 paper tags (for embellishing, one cut to 4 x 3 1/2 in. and one cut to 4 1/4 x 3 3/4 in.)
- Decorative ribbon 12 inches long
- Embroidery thread 2 1/3 yards (84 in.)
Tools:
- Bone folder or metal spoon
- Glue Stick (or paper glue of your choice)
- Scissors
Tools Used for Decorating...
- Stamp and ink or embellishments of your choice.
(The stamp used in this example is a sun stamp from the Celestial Rubber Stamp Set by Personal Stamp Exchange) - Paper piercing tool
- Embroidery needle
- Decorative scissors
Instructions:
Step 1. Fold Cardstock to make a Cover for each side of the Book.
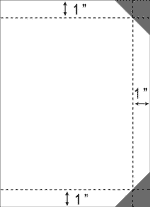
Taking each piece of your chosen cardstock (cut to 11 3/4 x 8 1/2 inches), fold as indicated by dotted lines to the right. Papers will each be folded 1 inch from top, bottom and right side. Smooth folds with bone folder tool or the round part of a spoon.
*This example uses 65 lb white cardstock.
Tip: To ensure a tight fit, it works well to make the top and side folds first, cover the notebook as intended and then make the last fold around the notebook itself. This way the book cover will be sure to fit exactly. Remove once to smooth folds with bone tool.
Note: The spine will still be visible with both cover papers in place.
Step 2. Cut off Corners.
Next, cut off the top and bottom right corners as shown above in gray.
Step 3. Glue on Cover Pieces.
After verifying that the cover fits well, glue the entire front and inner flaps of paper to the notebook's front and back cover. Allow glue time to dry before moving to step 2.
Tip: If your notebook has a rounded edge (composition notebooks usually do), simply pinch in the corner of the cover before you fold the edges over. Then resume the fold exactly as you would have done otherwise. See below for example.
 |
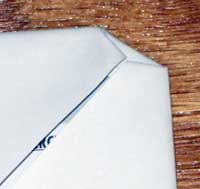 |
Note: If somehow the inside flaps aren't a perfect fit, no big deal, most of the inside will be covered by the end sheets.
Step 4. Apply decorative paper to cover.
Take your 9 3/4 x 9 1/2
inch paper and trim the right edge off the long side with decorative
scissors, cutting off as little as possible.
Now, glue the decorative paper to the front of the notebook starting
at the right front side of the book. Start the decorative side of your
paper about 1/4 inch from the right book edge. Wrap the decorative paper
across the notebook and around the spine to the back, gluing
thoroughly. Smooth completely and let dry. Refer to finished photo at
the top of the page if needed.
Note: To decorate your journal like the one shown here, follow along with the following steps... otherwise, skip to step 8.
Run the ribbon starting about 1 1/2 inches from the spine on front of journal, going from top to bottom. Glue ribbon down thoroughly, wrapping and gluing the ends around to the inside of the front cover.
Step 6. Make and Apply tags to the front of cover.
Start with the
largest tag and make seven evenly spaced sewing holes each about 1/4
inch in from the right side. Then take about 3 inches of embroidery
thread and sew inside each hole tying the loose thread in a knot to the
side. Leave the ends even and separate the individual strands of thread
that make up the embroidery thread. This will give it a more frayed look
if you want.
Next, with the smaller tag, rub distress ink on the edges and
lightly mist them with water. This causes the ink to bleed slightly and
creates a worn look. After the tag is dry, stamp it with a favorite
stamp. Glue down the tags as desired.
Step 8. Apply end sheets.
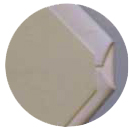
The front and back of your easy homemade journal gift are now complete. The finishing touch is the end sheets. Fit them against the inside of each cover, pushed in as far as possible toward the spine and centered between top and bottom as seen to the right. Glue each one down thoroughly, smooth and allow to dry. The end sheets cover up loose ends and give the embellished journal a sturdy and polished look from cover to cover.
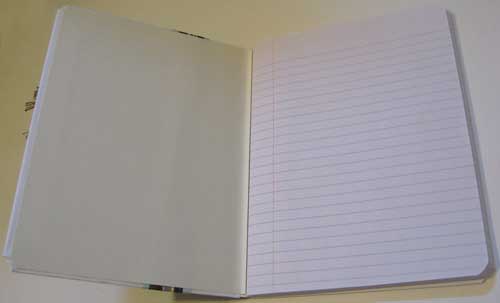
Now that was an easy homemade journal! And now you can start another easy homemade journal gift by completing the basic first steps with another notebook, and embellishing it in a whole new way.
Another easy to make journal idea is to utilize a postcard like this...
