DIY Aries Symbol Astrology Charms
Homemade Astrology Charms are a Fun Way to Celebrate Your Favorite Aries...
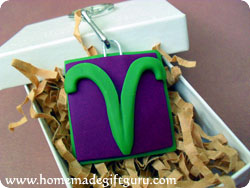
How do you make an Aries symbol astrology charm? How about oven-bake polymer clay!
...When I was in grade-school, I received several blocks of oven-bake polymer clay... a.k.a. Skulpey. I fell in love with it and used it to make creative gifts for just about everybody I knew.
There's so many possibilities for using polymer clay to create neat things. For example, you can make awesome clay beads, key chains, ornaments and creative charms.
In this tutorial, I'll show you how to use oven bake clay to create a unique astrology charm, featuring the Aries symbol.
Being creative with clay comes easy to kids and teenagers... and let's not forget the young at heart!
For this reason, I think polymer clay is a great homemade gift medium and I especially try to provide it for my kids to make cool stuff for their friends.
...For more teenager-friendly homemade gift ideas, feel free to check out this article on homemade teen gifts and gift ideas for the young at heart.
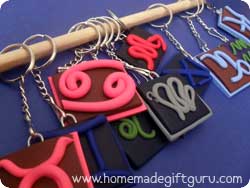
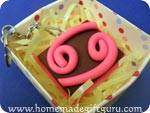
These clay charms can be made into fun homemade magnets, cute homemade key chains or even rear view mirror charms.
Key chains and rear view mirror charms in particular would be a great idea for a homemade sweet 16 birthday gift. You could also use this idea to personalize a photo frame or a birthday plaque with an astrology theme.
So... If you know someone who enjoys astrology, a personalized clay astrology charm might be the perfect thoughtful homemade gift just for them.
For more sun signs, including dates and astrology templates, click here.
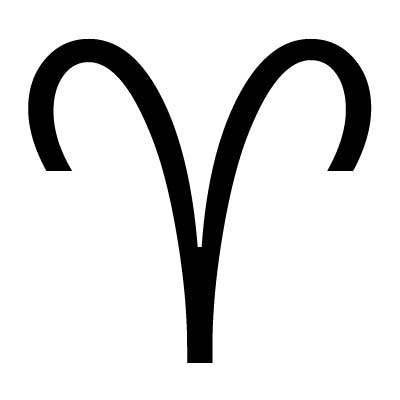
Aries Facts...
March 21-April 19th
The Ram
Element: Fire
Keywords: I am
Note: People born within a day or two of any sign are "on the cusp." This means they could be either sign. For those on the cusp, you can plug in the birth date and year here to determine the correct sun sign (or just ask them, a lot of people know their sign).
Get more sun sign facts and FREE printable astrology symbol templates here!
How to Make an Aries Symbol Astrology Charm...
One of the things that's awesome about oven bake polymer clay, is that you don't need a lot of tools or special equipment to work with it. A simple straight edge glass for rolling plus a knife and a toothpick for example, will get you going on all kinds of fun polymer clay projects.
To Make This Aries Symbol Charm You'll Need:
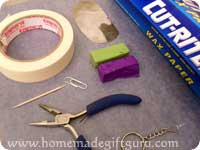
- Polymer clay (Sculpey III) in two colors
- Rolling pin or straight sided glass to roll clay out with
- Straight edged knife or something to cut clay
- An Oven
- Baking sheet
- Optional... Metal paper clip (if you want to make a hook on top
Helpful Tools:
- Wax paper
- Masking tape
- Wire cutters
- Tooth pick
- Lint free cloth and/or baby wipes for easy clean up during and after
Instructions:
1. Prepare Work Surface.
You can tape a piece of wax paper to your work surface to keep it clean.
2. Condition Clay.
Your polymer clay will be hard and slightly brittle at first. To soften it, break it up into 3 or 4 pieces and warm it in your hands.
Start kneading and twisting the clay. As the clay gets softer, start rolling it into snake like lengths, squish and press back together, roll into ball and repeat until clay is soft, smooth and even.
Tip... If needed, wipe hands with cloth or baby wipe between conditioning different colors.
3. Roll Out Two Pieces of Clay - Each a Different Color.
Do this however you like. One way is to put a ball of clay between two layers of wax paper and use a straight edged glass to roll it flat. Pick up the disk a couple times to prevent sticking.
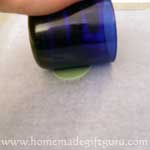
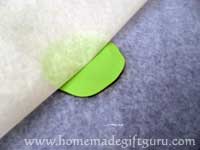
Tip... It's a good idea to wipe your work surface with a lint free clean cloth between rolling different colors.
4. Cut Clay into Squares - One Slightly Larger than the Other.
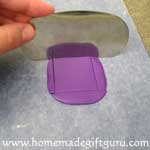
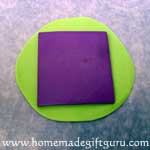
Using a knife or other straight edge tool, cut a square or rectangle from the color you plan to use on top.
Lay this on top of the uncut disc. Now you can easily cut the other color slightly larger then the first (as shown below).
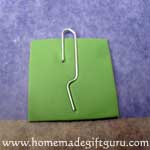
5. Snip the End off a Paper Clip.
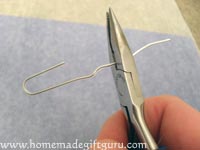
If you want to turn your charm into a key chain, an ornament or a rear view mirror charm, you might want to make a hook on top.
A paper clip works great for this.
To create a hook using a paper clip, first open the paper clip and cut off the end as shown.
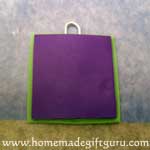
6. Enclose paper clip.
Next, press the paper clip gently into the bottom base piece and cover it with top base piece. Press down gently to stick.
7. Roll Clay into a Coil.
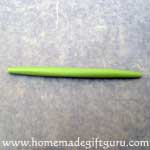
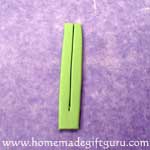
To make this Aries symbol, roll clay out evenly into a snake-like coil (bottom left).
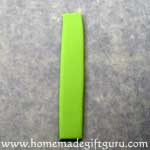
Gently flatten the coil by laying wax paper over it and lightly rolling lengthwise, using a glass or rolling pin, to get something like what's shown below (bottom right).
8. Cut and Bend Coil into Aries Symbol.
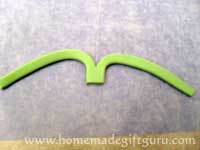
Slice down the center, leaving the bottom 1/4 inch un-sliced (shown bottom left).
Pull each side apart (bottom middle).
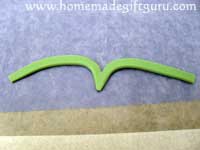
Trim the bottom into a point (bottom right).
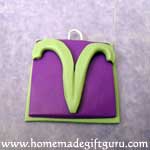
Continue to mold clay gently until you are satisfied with your Aries sun sign symbol.
9. Attach Symbol to Charm Base.
To attach the symbol you made, gently press it down to stick it to the base.
Take care not to squish the clay symbol or leave finger prints.
Tip... The clay is sticky so you don't have to press much for it to stick together.
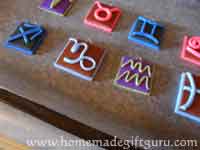
10. Bake Clay.
Bake clay on parchment lined baking sheet in oven at the temperature and time specified on manufacture's instructions.
For the Sculpey III used here, the pieces were baked at 275° F (130° C) for 15 minutes.
Tip... Do not over bake, Sculpey III polymer clay will scorch easily. Scorched clay is not pretty! :)
More Astrology Symbols...
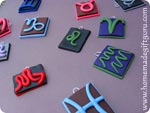
Taurus Symbol, Gemini Symbol, Cancer Symbol, Leo Symbol, Virgo Symbol, Libra Symbol, Scorpio Symbol, Sagittarius Symbol, Capricorn Symbol, Aquarius Symbol, Pisces Symbol
Aries Symbol Astrology Charm Tips...
- To turn your Zodiac charm into a magnet, leave out the paper clip and once baked, glue a magnet to the back or attach self sticking magnet strips.
- These make great homemade birthday gift ideas, homemade teen gifts, homemade boyfriend gift ideas or girlfriend gift ideas and homemade graduation gifts for friends.
- Use whatever colors you like.
- String it up for a cute rear view mirror charm...
